|
Complete Overhaul of Late-40s Telechron Clock
This clock was functioning, but the rotor was making grinding sounds. The clock had a B-8 model rotor, 2 Watts, and with the unusual feature of an oil plug in the coil end of the rotor. The date code on the rotor was November 1947.
I disassembled and cleaned the clock movement, opened and overhauled the rotor, fixed the magnetic power failure indicator, and reassembled.
Special thanks to Adam for the help restoring the rotor.
|
|
|
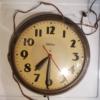
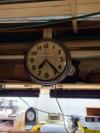
Telechron wall clock from late 40s.
|
|
|
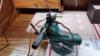
To overhaul the rotor, you need to open the sealed can to access the movement. Here I cut it open on a lathe.
|
|
|
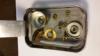
Once the can is open, you need to drill out the (3) rivets holding the outer plate to the movement. Tap the rivet stumps for small screws prior to reassembly.
|
|
|
The rotor internals after ultrasonic cleaning.
|
|
|
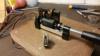
Test the rotor in the field generated by the coil before sealing up the can.
|
|
|
Oil the rotor movement by saturating between the capillary double plates on each side. Also oil the wheel arbors, and reinstall into the can. I put a dab of lithium grease on the inside end of the can (spinning paddle end), to help with noise if the field draws the paddles to the end. Seal the can with epoxy, smooth it, and let it cure.
|
|
|
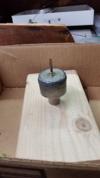
Test the rotor on the coil field before reassembing the clock. I ran it overnight in different orientations to move the oil around inside.
|

Video of pwr indicator |
This clock needed a replacement arm on the power failure indicator arbor. This arm is pulled by the magnetic field from the coil and drops away (showing red on the dial) upon power failure.
|
|
|
I reassembled the clock and replaced the power cord. That's it.
|
|